Seamless OpenAEV scenarios deployment using XTM Hub

Ellyn Bouscasse
Senior Product Owner - XTM HUB

Sébastien Miguel
Product Manager - OpenAEV

Valentin Stern
Senior Software Engineer
-
 Copied!
 -
Copied!
-
Copied!


We’re excited to share a major update that’s going to change how you work with OpenAEV. Remember the one-click deployment of resources that made OpenCTI easier to use? Well, it’s now available for OpenAEV scenarios too. With just one click, you can now deploy any scenario directly from XTM Hub to your OpenAEV platform. It’s that simple.
This isn’t just about saving time, it’s about making OpenAEV more accessible, letting you focus on what truly matters: strengthening your security posture.
TL;DR
- Deploy real-life attack scenarios on OpenAEV in one click
- Register your OpenAEV platform into XTM Hub
Register your OpenAEV platform in XTM Hub
Following the launch of one-click Cyber Threat Intelligence resource deployment for OpenCTI, you can now deploy scenarios directly to OpenAEV with the same ease.
Note: The permissions required for the register process to work properly are “Manage platform settings” on OpenAEV and “Manage OpenAEV Registration” on XTM Hub. You will also need the appropriate capability to create scenarios on OpenAEV to use the one-click deployment feature.
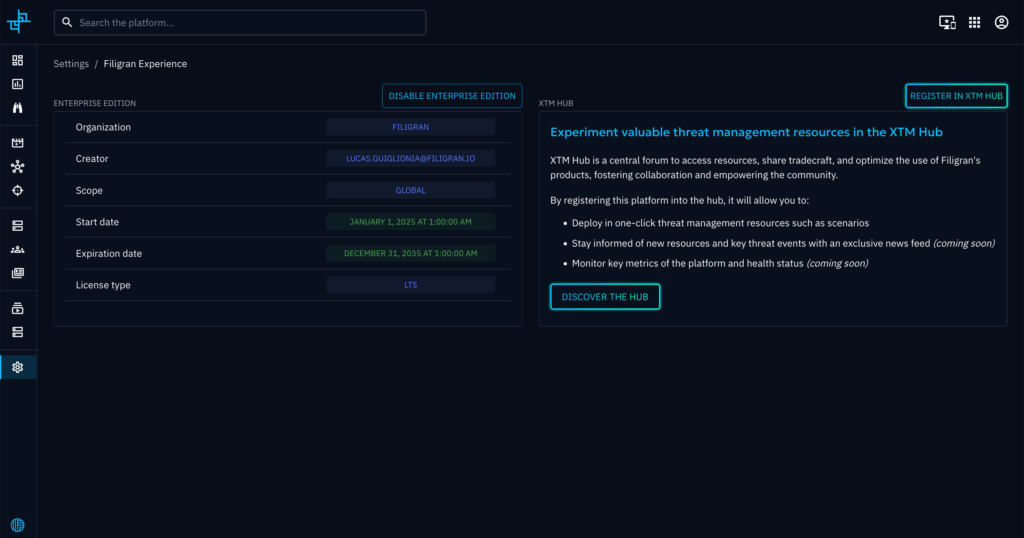
The new one-click deployment feature requires your OpenAEV platform to be connected to XTM Hub. To do so:
- In OpenAEV, navigate to Settings > Filigran Experience.
- Click the multicolored “Register in XTM Hub” button to start the registration process. (Don’t worry, this process is fully reversible.)
- XTM Hub will open, prompting you to choose which profile to associate with your platform.
- Complete the setup (you might need to log in if your session has expired)
After registration, your OpenAEV platform will appear as a tile on the XTM Hub dashboard, displaying both its name and a quick access link.
Deploy real-life attack scenarios in one click
Important note: Filigran scenarios accurately simulate real-world threat activity but are inherently non-destructive and pose no operational risk
On XTM Hub, find the scenario you want to use and click “Deploy in OpenAEV.”
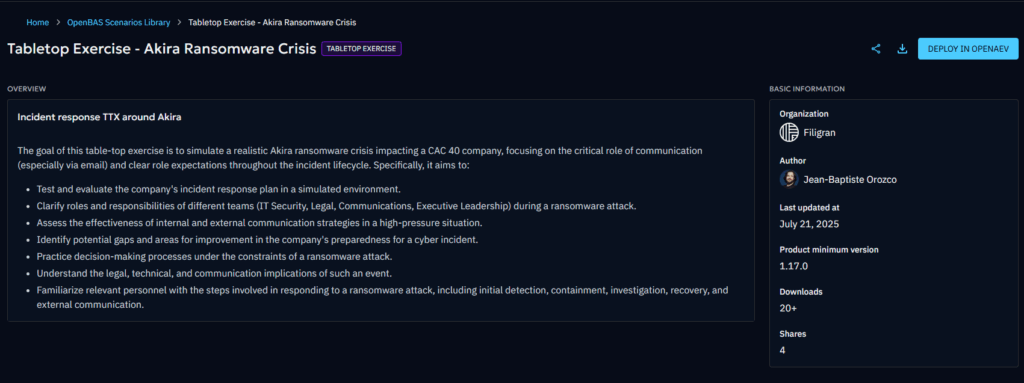

If you have multiple platforms registered, select the target platform, or confirm the deployment if only one is available.
You’ll be redirected to the OpenAEV scenarios list where your newly created scenario will appear. The platform automatically imports it from the XTM Hub library.
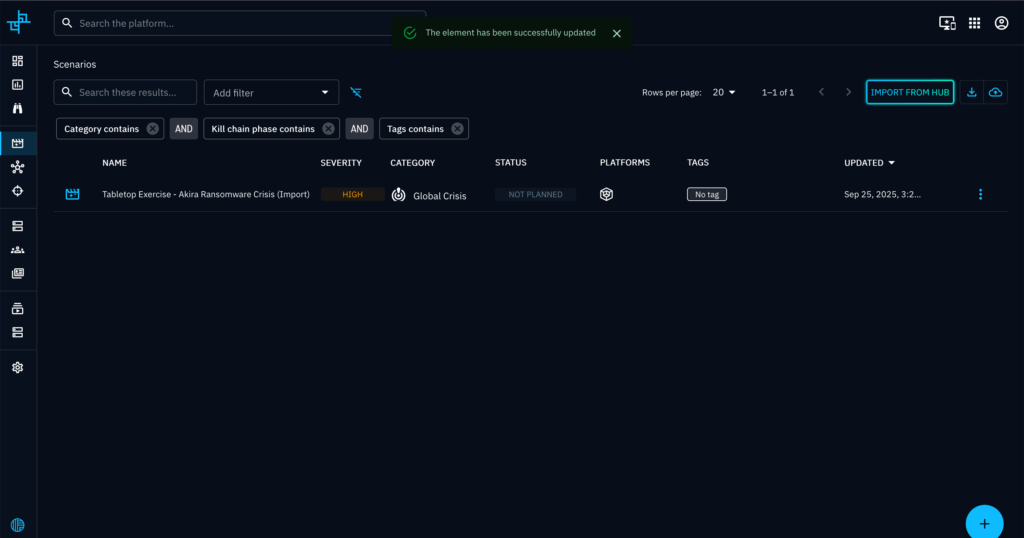
You can now simulate attack scenarios without any hassle !
Configure your real-life attack scenarios
Once the scenario is deployed you, open it. This example uses a tabletop scenario, so we can define a test team and made bulk update to run it:
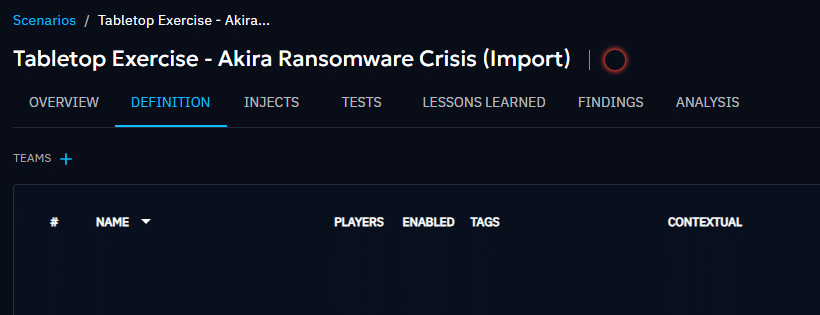
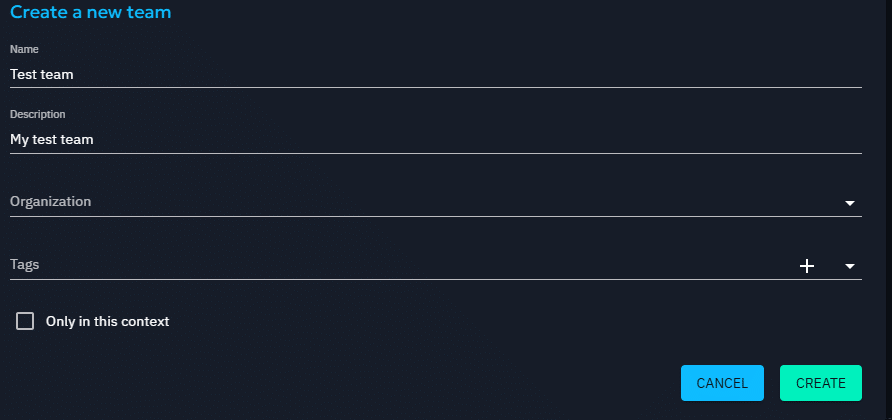
If you don’t yet have a team, click on “Create a new team”:

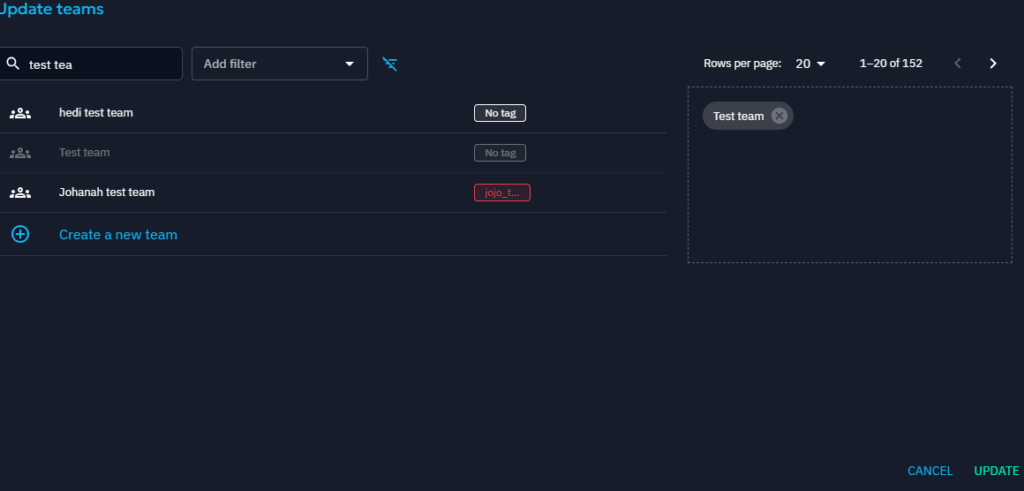
Once created, your team will be automatically set. You can add more teams if needed or simply click “update”:
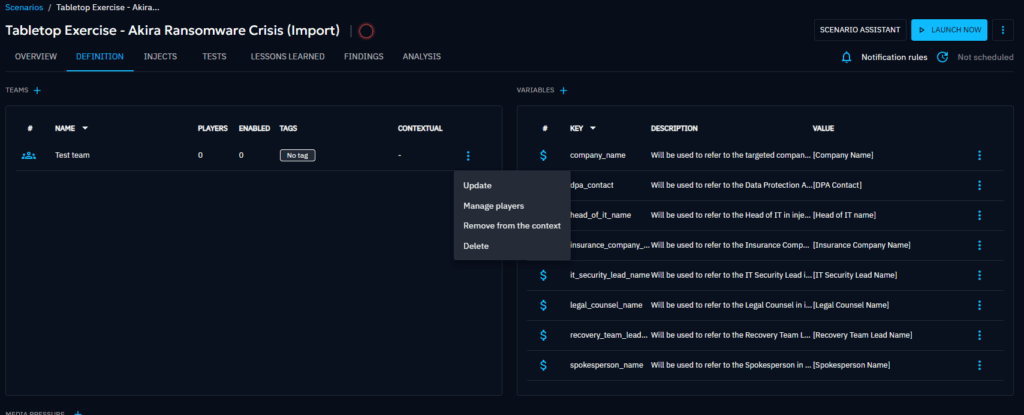
Next, you’ll see your team, but no players yet. Click the right-side button to manage your team.
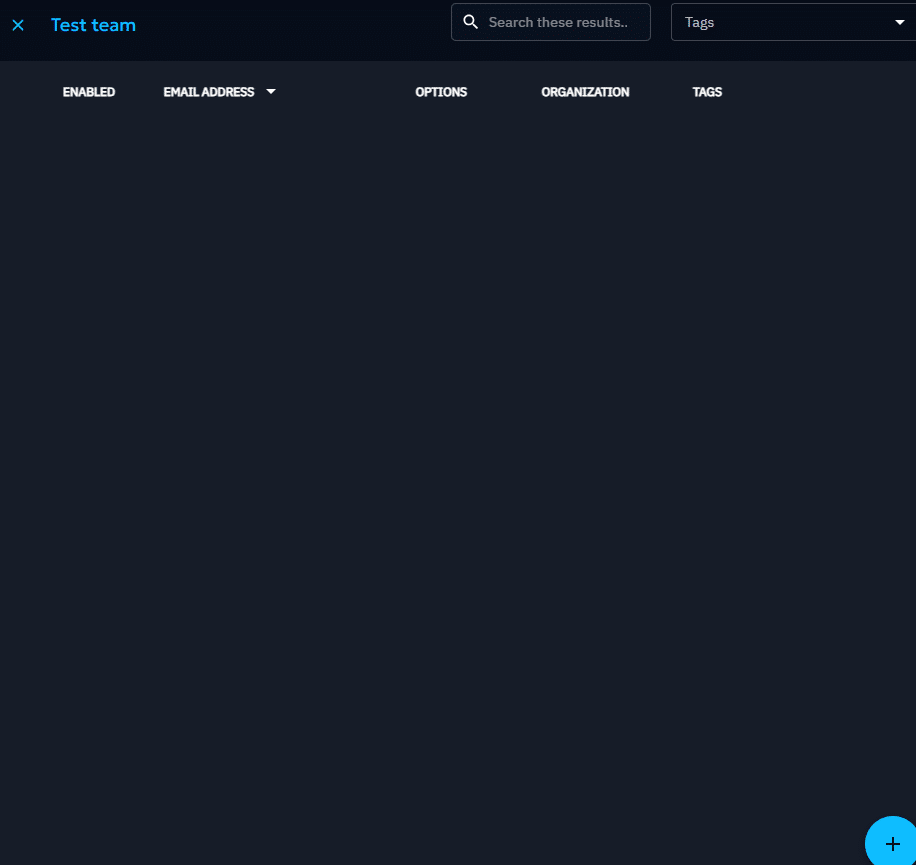
You can now select “Manage players” to add members in your team, then click on the + Button:
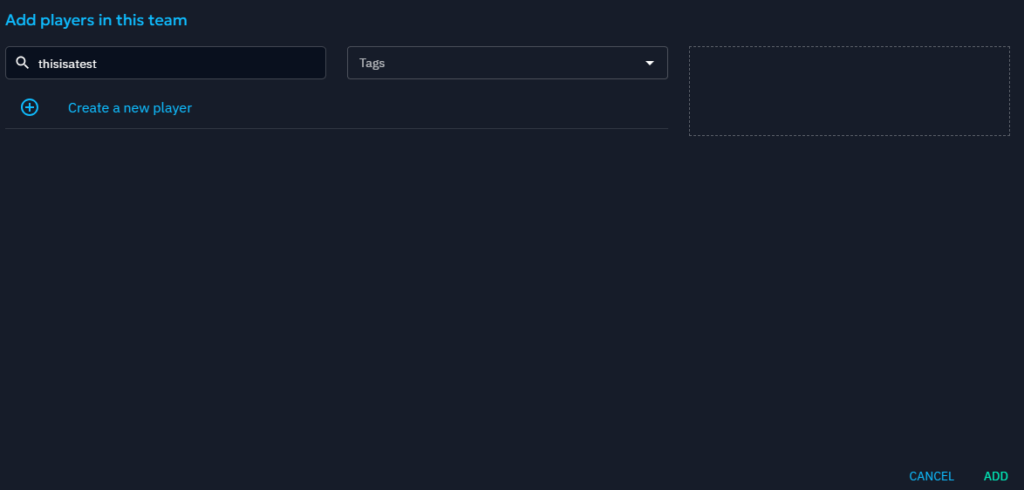
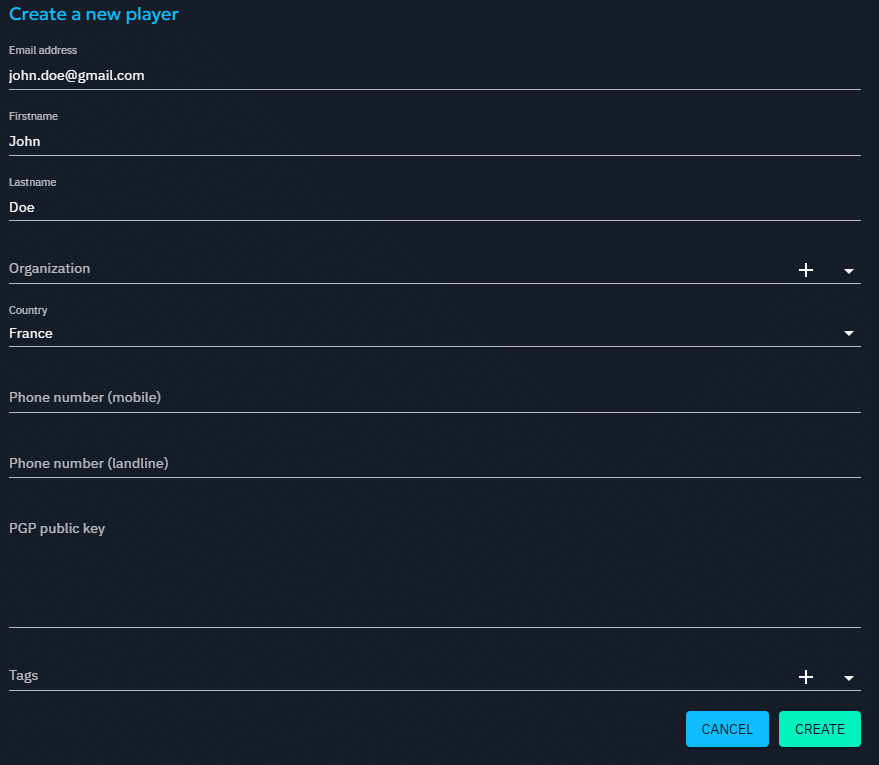
When creating new players, ensure their email addresses are correct. They’ll be used as recipients for the scenario inject emails.
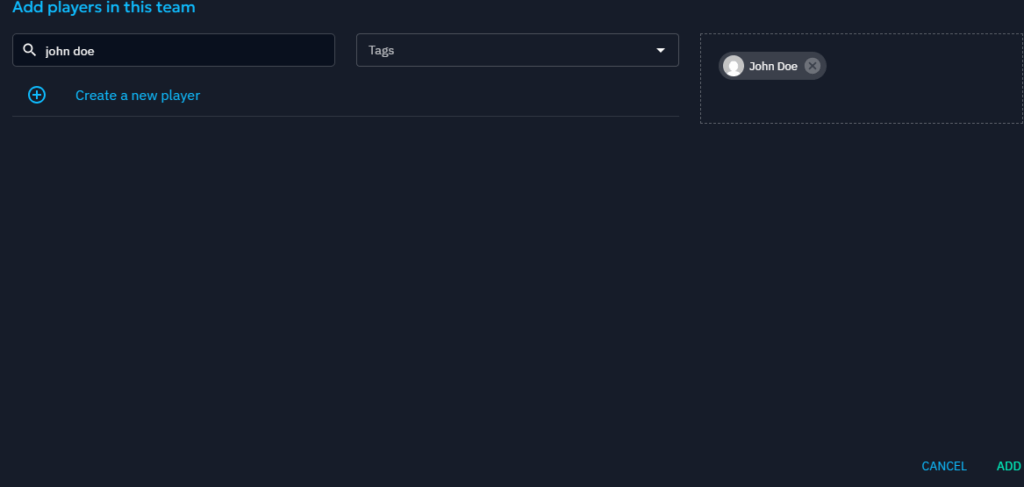
Almost done! Click “Done” once the player is added.
You can now close the window and go to the injects tab:

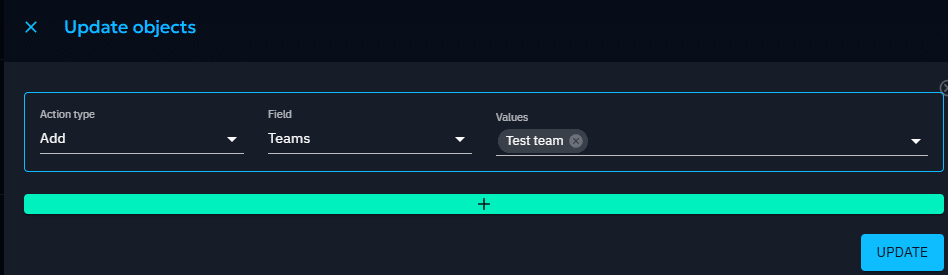
If you see a lot of red indicators, don’t worry! Let’s fix that with a bulk update. Select the global checkbox, then click “Update.”
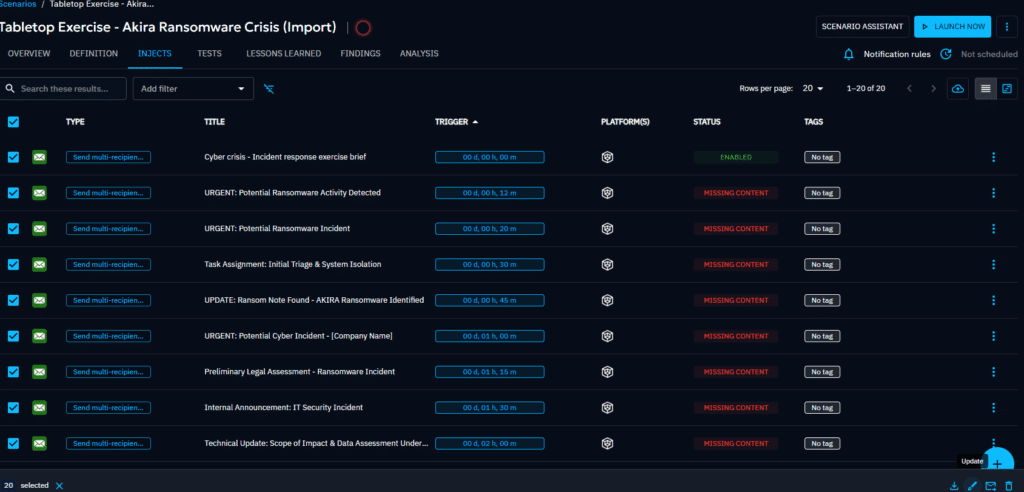
Choose your team from the list and click “Update.”
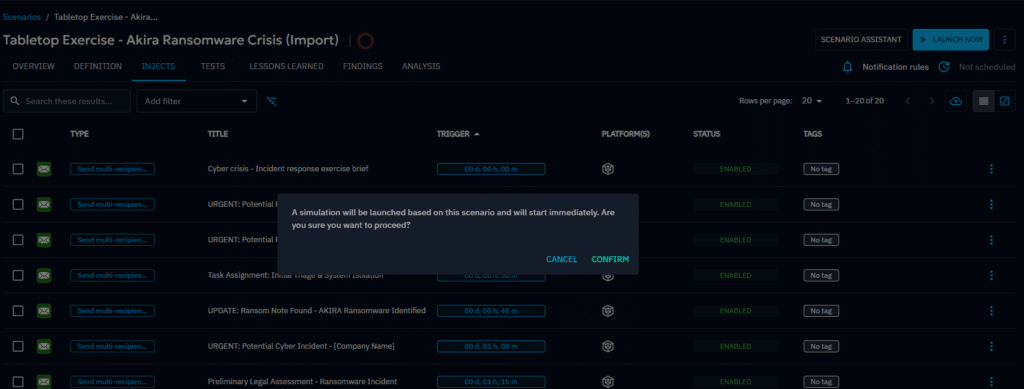
You should now see all green indicators, great job! You can manually launch your scenario or schedule it for later.
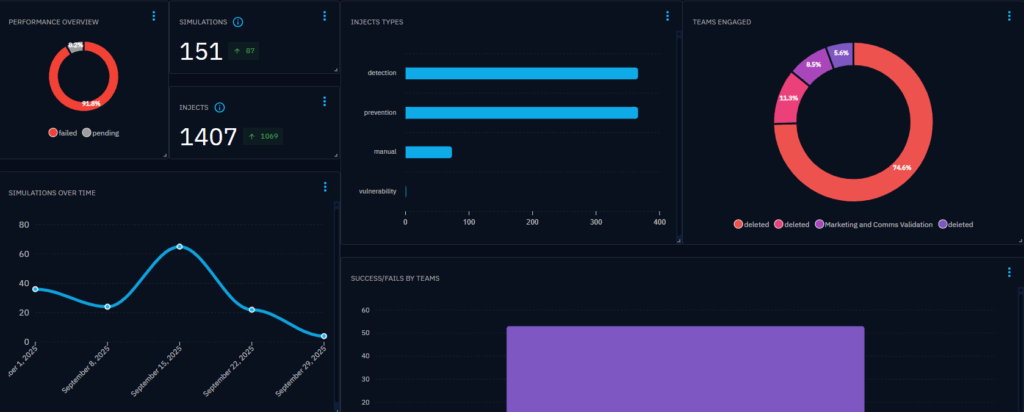
Once it’s complete, view your metrics on the Analysis tab.
Conclusion
While this walkthrough focused on a tabletop scenario to illustrate the full deployment process, from XTM Hub to simulation results, the same logic applies to technical scenarios, where targets may include specific assets.
We’ve successfully introduced one-click deployment for OpenCTI, and now OpenAEV joins the lineup with the same seamless experience. These milestones are key steps in our mission to simplify cybersecurity operations.
And this is just the beginning. As we continue to expand XTM Hub’s capabilities, we’re discovering new ways to enhance your experience across our ecosystem.
Stay tuned as we unlock even more features and continue building a unified threat platform that transforms how you work with our tools. The best is yet to come!
Enjoy and feel free to ask any questions about it on our Slack community channel !
Read more
Explore related topics and insights


