Prevent false positive indicator creation with exclusion lists


François Grunert
Associate Software Engineer

Jérémy Cloarec
Senior Software Engineer

Valentin Bouzin
Senior Software Engineer
-
 Copied!
 -
Copied!
-
Copied!


The fight against false-positive indicators is a perpetual struggle in the discipline of threat intelligence. How can you prevent that indicators from your EDR alerts from being pushed to detection automatically? These false positives, while harmless, slow down security teams and distract them from addressing real threats.
To solve this issue, you can decide to create a whitelist of trusted indicators. This list enables the CTI service to disregard these specific indicators, reducing alert noise and ensuring more effective monitoring.
In this article, we will describe how OpenCTI now enables you to use those kind of whitelists to prevent those false-positive from being ingested in the platform, with the help of exclusion lists.
Introducing exclusion lists
OpenCTI already enables you, through playbooks and enrichment connectors, to manipulate various types of data, including indicators ingested into the platform. However, this data manipulation is done after ingestion, meaning that an indicator could have been pushed to detection automatically before it was marked as safe.
To solve this issue, version 6.5 of OpenCTI introduces a new type of settings customization: Exclusion lists.
How exclusion lists work
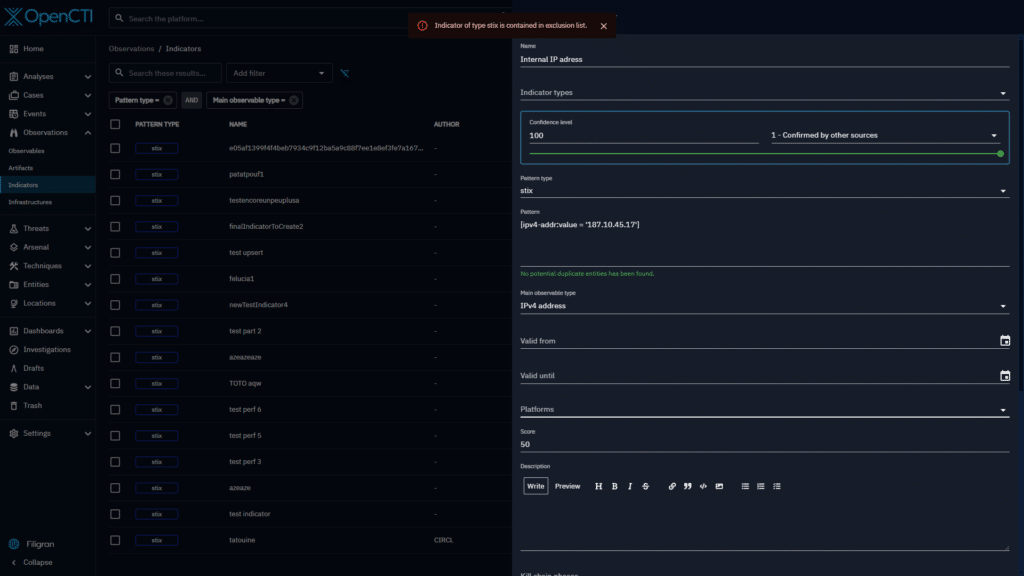
These exclusion lists give you the ability to define a list of indicator values that will be completely excluded from the platform. This means that if an indicator sent to the platform matches an indicator value contained in one of the exclusion lists, its creation will be rejected, and the indicator will not be ingested at all.
These exclusion lists currently apply to one type of indicators: indicators with a STIX pattern type. And for now, only a specific number of observable value types are handled: Artifact, Domain-Name, Email-Addr, Hostname, IPv4-Addr, IPv6-Addr, StixFile and Url.
Depending on the observable value types (primary observable type) the matching capability may vary:
- For
IPexclusion lists, you can use unique IPs such as190.168.0.1. But IP ranges are also compatible: you can decide to exclude the192.168.0.0/28IP range for example. - For
Domain-NameandUrlexclusion lists, you can use specific domain names such asmydomain[.com](<http://google.com>). But you can also exclude entire subdomains: if you configure your exclusion list with.mydomain.com, all subdomain using this domain name will be excluded, likeproduct.mydomain.com,info.mydomain.cometc…
For all other observable value types configuration, an exact match will be attempted between the value in the indicator and the value in the exclusion lists.
Let’s now take a closer look at how to configure those exclusion lists!
Create an exclusion list
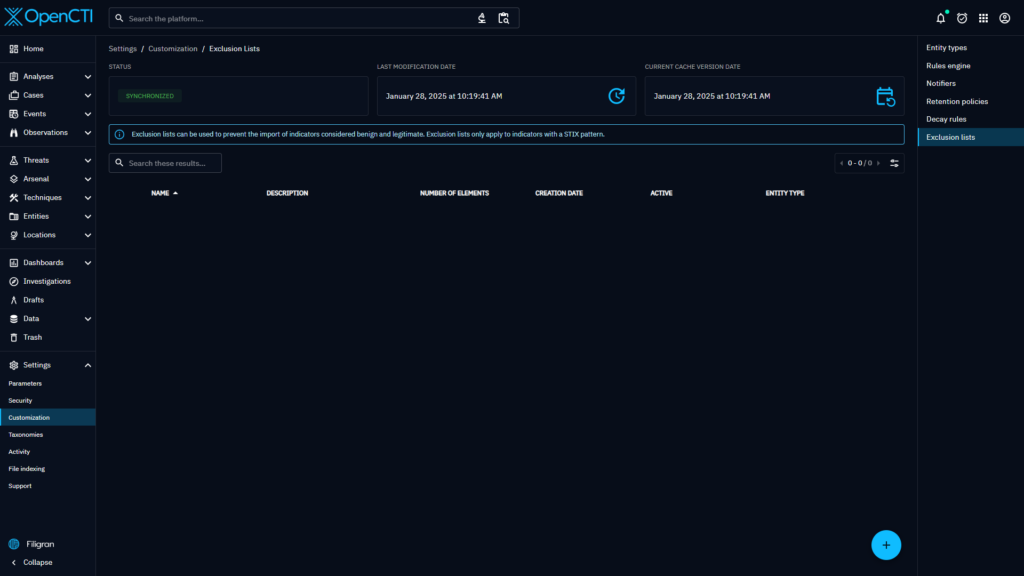
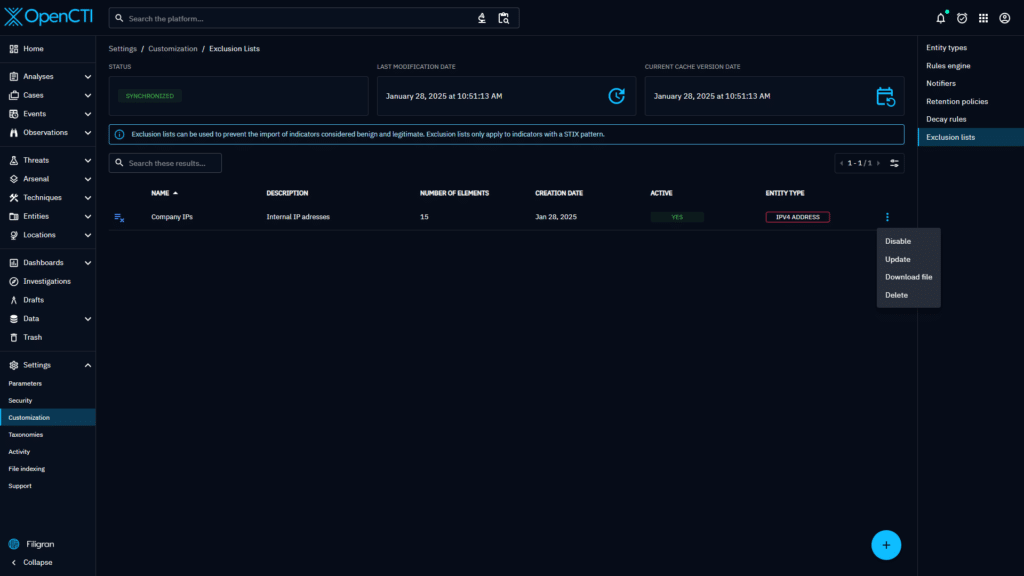
First, go to the Settings and Customization menu. On the right hand side, you will see a new menu titled “Exclusion lists”.
On this first screen, you can see the interface’s main view, which presents a clear, organized display of the existing lists.
You can click on the + button to create a new list.
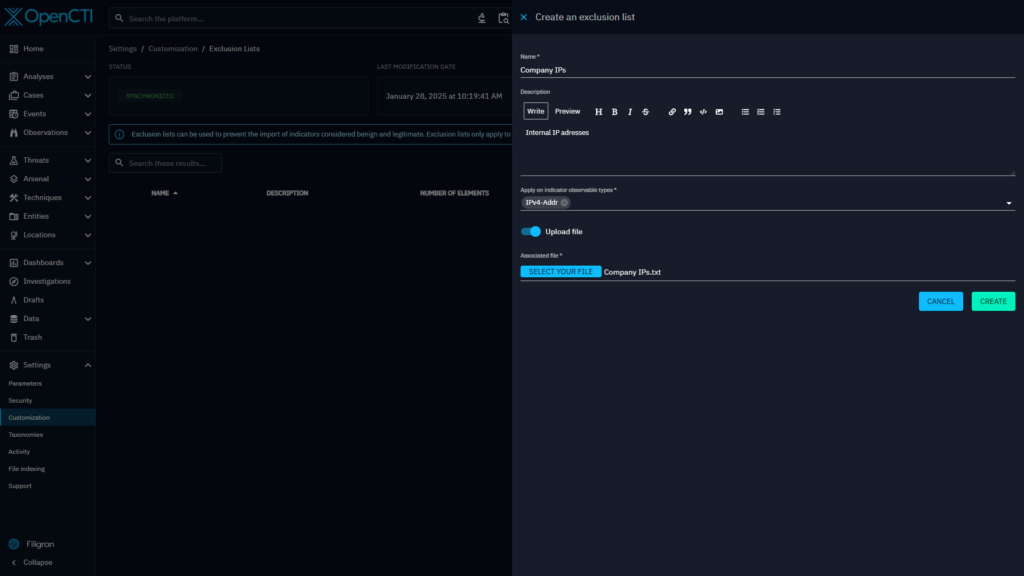
When creating a list, you can provide the following data:
- Name
- Description
- Indicator observable types : this corresponds to the contents of the exclusion list
- Content : you can upload a file or copy/paste your content using the toggle button
As mentioned earlier, different indicator observable types are possible :
Artifact, Domain-name, Email-Addr, Hostname, Ipv4-Addr, ipv6-Addr, StixFile, Url
Managing exclusion lists
Once created, you can see that the status is In progress and that the Last modification date has changed. This is because the new exclusion list has been created, but still needs to be propagated to all of the platform nodes.
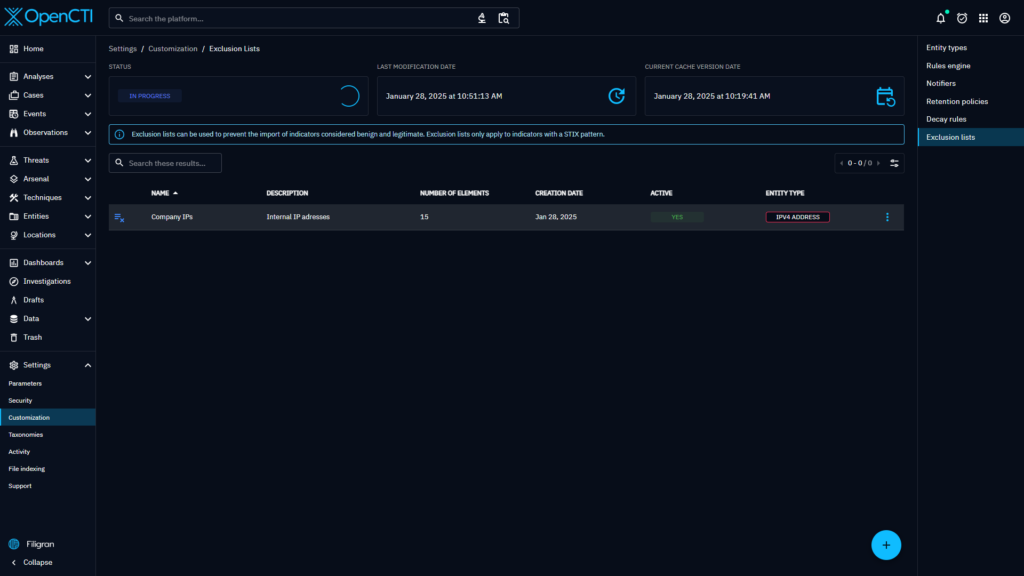
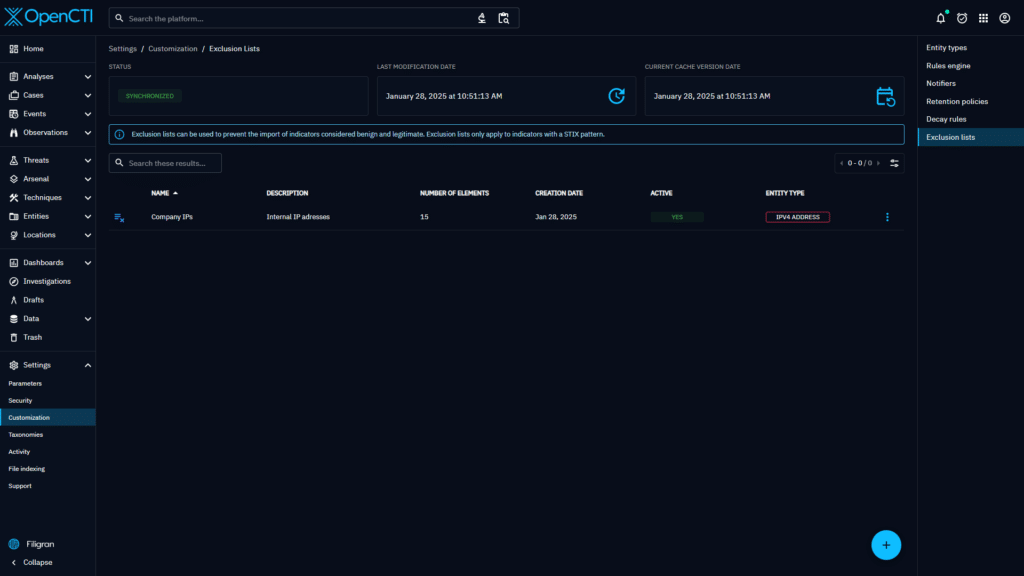
Once the last modification date and the Current cache version date are up to date, the status changes to Synchronized again. Your new exclusion list is ready to be applied!
On the list of exclusion lists, you can also see some additional information: the number of lines contained in your list, the creation date and the activation status.
There are several options available in your exclusion list:
- Delete: if you want to completely remove the list from the settings
- Activate/deactivate: this can be used to temporarily pause the application of a list
- Edit: if you want to modify your current list
You can also download the raw file containing all of your exclusion list values.
From now on, when an indicator is about to be created (regardless of the source: Connector, Feed ingestors or manually), if its pattern contains an observable value belonging to an exclusion list, the indicator will be blocked, displaying an error message of ‘Indicator of type stix is contained in exclusion list’.
Edit an exclusion list
If you want to modify an exclusion list, you can open the edit drawer. Here the information can be changed and you can edit the contents of the exclusion list (if the file size is less than 1M).
It is also possible to completely change the file, by toggling Upload a file .
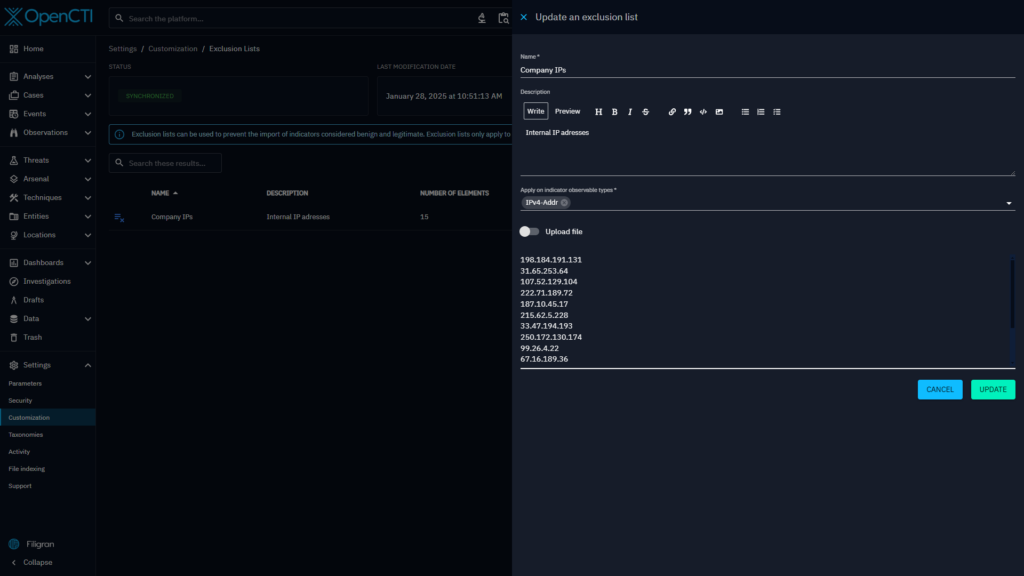
If the contents of the list are updated, the status will be in progress and the exclusion list will be propagated and resynchronized.
Performance impact
During the design stage, we focused heavily on minimizing the impact on data ingestion performance and throughput.
Since the introduction of exclusion lists adds a new step to data ingestion, where the indicator can be potentially checked against a high number of excluded values, we had to make sure that the ingestion of all indicators remains efficient.
To do so, we’ve set some limits to the number of values allowed per file: an exclusion list cannot exceed the size of 10Mo.
Additionally, we’ve invested significant time optimizing the exclusion list verification algorithm. As a result, you can configure a large number of excluded values while maintaining the same ingestion throughput. Our extensive testing with large volumes of exclusion lists showed that even with 2 million excluded values, the checking process takes less than 1ms.
Conclusion
The addition of the exclusions list marks the first step toward pre-ingestion manipulation of data, and is an essential tool for handling false positives.
Multiple improvements are under consideration to extend exclusion lists capabilities. Currently, when an indicator matches an exclusion list, it can only be rejected. In addition to the capability to reject an indicator, future updates could introduce options like applying labels before ingestion, sending notifications or implementing others exclusion actions. Please let us know about any feedback on this topic.
Join us on our Slack community channel to tell us what you think!
Checkout the user documentation for more technical information about the feature.
Read more
Explore related topics and insights


